How To: Optimize the Serverless Optimizer Plugin
Learn how to use the Serverless Optimizer Plugin to reduce deployment package sizes and optimize your dependencies. Plus, I'll show you how to configure your Serverless project to skip optimization on locally run functions.
I'm sure you're already well aware of how awesome the ⚡ Serverless Framework is for managing and deploying your serverless applications. And you're probably aware that there are several great plugins available that make Serverless even better. But did you know that there was a plugin to optimize your functions and reduce the size of your deployment packages? Or are you already using this plugin to optimize your functions, but hate how it takes too long to optimize locally run functions? In this post I'll share some quick tips to help you optimize your Serverless Optimizer experience.
Introducing the Serverless Optimizer Plugin
The plugin we want to use is actually named "serverless-plugin-optimize", not to be confused with "serverless-optimizer-plugin". The latter was the original project that was abandoned a few years ago. Lucky for us, a few guys at Fidel Limited in the UK forked a new version that is still supported. If you aren't familiar with this plugin, you should take a few minutes to read more about it: https://www.npmjs.com/package/serverless-plugin-optimize.
Why use the Optimizer on our Functions and Packages?
The most important reason to use the optimizer is probably package size. Serverless is great, but unless you specify what to include or exclude in each package, Serverless will bundle everything except development dependencies by default. This means that EVERY function and EVERY node dependency gets added to EVERY package zip. If you have several functions as part of your Serverless project, even if only some have several dependencies or make use of common modules, every deployed package will contain all of those files. This means your package size will be much larger than is needed to run a specific function. This can result in longer cold start times, higher memory usage, and slower deployments.
Another great reason to use the optimizer is for auto-dependency detection and minification of functions. Serverless lets you include/exclude files, but the Optimizer Plugin goes the extra mile and does this for you. Any required files (including local and node modules) will automatically be included along with your main function handler module. It then combines those into one file and minifies it to make the final package size even smaller.
Installing the Optimizer Plugin
Installing the plugin is super easy since it is part of the Serverless plugin repository. Run the following command in your project's directory:
1sls plugin install -n serverless-plugin-optimize

This will add a dev dependency in your package.json file as well as an entry in your serverless.yml file's plugins section:
1plugins:2 - serverless-plugin-optimize
Alternatively, you can install this with a package manager (npm install serverless-plugin-optimize --save-dev) and then the add the entry to the plugins section yourself.
You also need to make sure that you've got your package settings set to package functions individually. This can be done by adding the following to your serverless.yml file:
1package:2 individually: true
And that's it! Whenever you deploy, package, or locally invoke your functions, they will be run through the optimizer.
A Quick Example
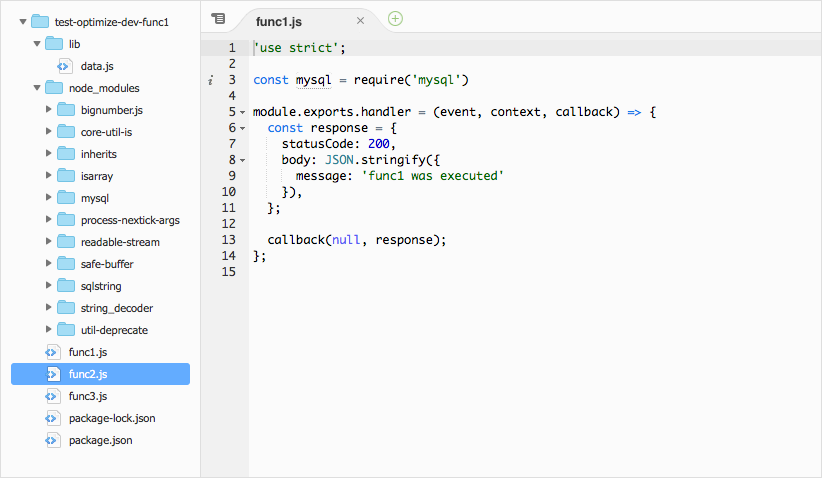
It probably makes sense to show you a quick example of what the optimizer does. I've created a sample Serverless project called "test-optimize" and added two functions to it: func1 and func2. func1 requires the mysql package and func2 requires a tiny local data module from the lib directory.
func1:
1'use strict'23const mysql = require('mysql')45module.exports.handler = (event, context, callback) => {6 const response = {7 statusCode: 200,8 body: JSON.stringify({9 message: 'func1 was executed'10 }),11 }1213 callback(null, response)14}
func2:
1'use strict'23const data = require('./lib/data.js')45module.exports.handler = (event, context, callback) => {6 const response = {7 statusCode: 200,8 body: JSON.stringify({9 message: 'func2 was executed'10 }),11 }1213 callback(null, response)14}
Without the Optimizer plugin, the deployed packages both have the same code size:
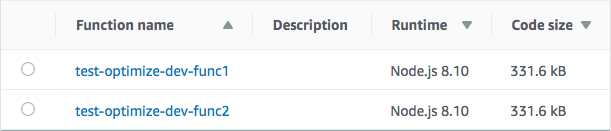
If we look at the contents of each package, they also both contain EXACTLY the same files, including an extra func3.js file that isn't used, the package.json files, and every node module.
test-optimize-dev-func1:
test-optimize-dev-func2:

If we enable to Optimizer and deploy them, we get the following:
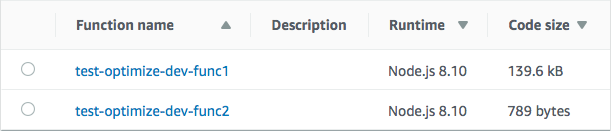
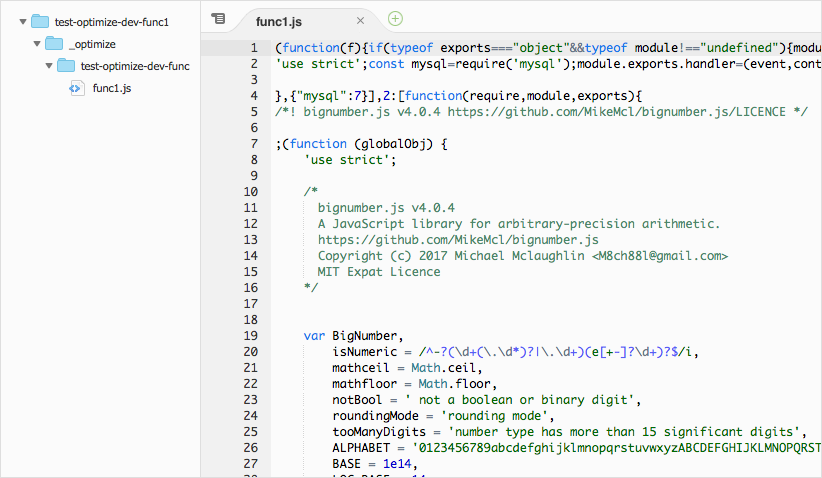
Notice how the code sizes are dramatically different. If we look at the contents of each package now, we see that all of the extraneous files are gone AND the necessary dependencies have been included in one, minified file.
test-optimize-dev-func1:
test-optimize-dev-func2:

Not only have we significantly reduced our packages sizes (which makes deployments a lot faster), we removed all unnecessary files. The only drawback is that this will affect dynamic module loading. However, you can use the includePaths configuration for the Optimizer Plugin and include them in your package manually.
Speeding up Development
Once you start using the Optimizer Plugin, you might notice that invoking functions locally takes more time because it has to optimize the function before executing it. Depending on the size of the function, the Optimizer could take several seconds to run. This is less than ideal and may force us to disable the plugin while developing, but then forget to turn it back on.
The solution is to disable the optimizer based on your current stage! You can configure the Optimizer at a global project level by adding an optimize entry in the custom section of your serverless.yml file, but you can also configure the Optimizer for each function by adding an optimize entry under a function. If we set this to false, then the function won't be optimized. However, we want to do this conditionally based on stage. We can accomplish this by adding a custom variable (we'll call it enable_optimize) and add an entry for the stage we want to disable (let's use local):
1custom:2 enable_optimize:3 local: false
Then we can add an optimize entry under the functions that we would like to disable optimization per stage. Notice the value is referencing our custom.enable_optimize with the current stage and defaulting to true if it doesn't exist.
1functions:2 func1:3 handler: func1.handler4 optimize: ${self:custom.enable_optimize.${opt:stage,'dev'}, 'true'}5 events:6 - http:7 path: /func18 method: get
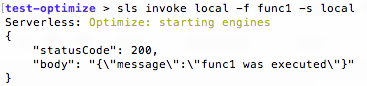
Now invoking the function with the local stage will skip optimizing the function:
However, invoking with the dev stage will:
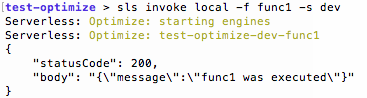
Now you can run your functions locally without needing to wait for the Optimizer to run every time.
More Serverless Workflow Optimizations
There are a lot of ways to optimize your Serverless workflows. You can read my post: How To: Manage Serverless Environment Variables Per Stage to help you make managing connections to multiple resources much easier.
If you want to save yourself from misspelling stage names, you can check out Serverless Stage Manager. This allows you to restrict the stage names used for full-stack and function deployments.
If you plan on connecting to a database with your serverless functions, you can read How To: Reuse Database Connections in AWS Lambda and How To: Manage RDS Connections from AWS Lambda Serverless Functions.
If you're new to serverless, or are bit unsure about how to secure your serverless applications, read my post Securing Serverless: A Newbie's Guide. This will give you an overview of all the things you need to think about to protect your application and customer data.
Finally, if you're building a REST API with AWS Lambda and API Gateway, check out Lambda API for a blazing fast, built-for-serverless alternative to using other web frameworks like Express, Fastify, Hapi, etc.